
SceneBook — Scene Detection & Video Contact Sheet
SceneBook — Scene Detection & Video Contact Sheet
Before sending a rough cut to review, you need to sort out "how many cuts it has" and "where each
scene is and how long it runs." If you have ever played a video start to finish while writing
timecodes by hand, you know how tedious that is. Opening Premiere or DaVinci and placing markers
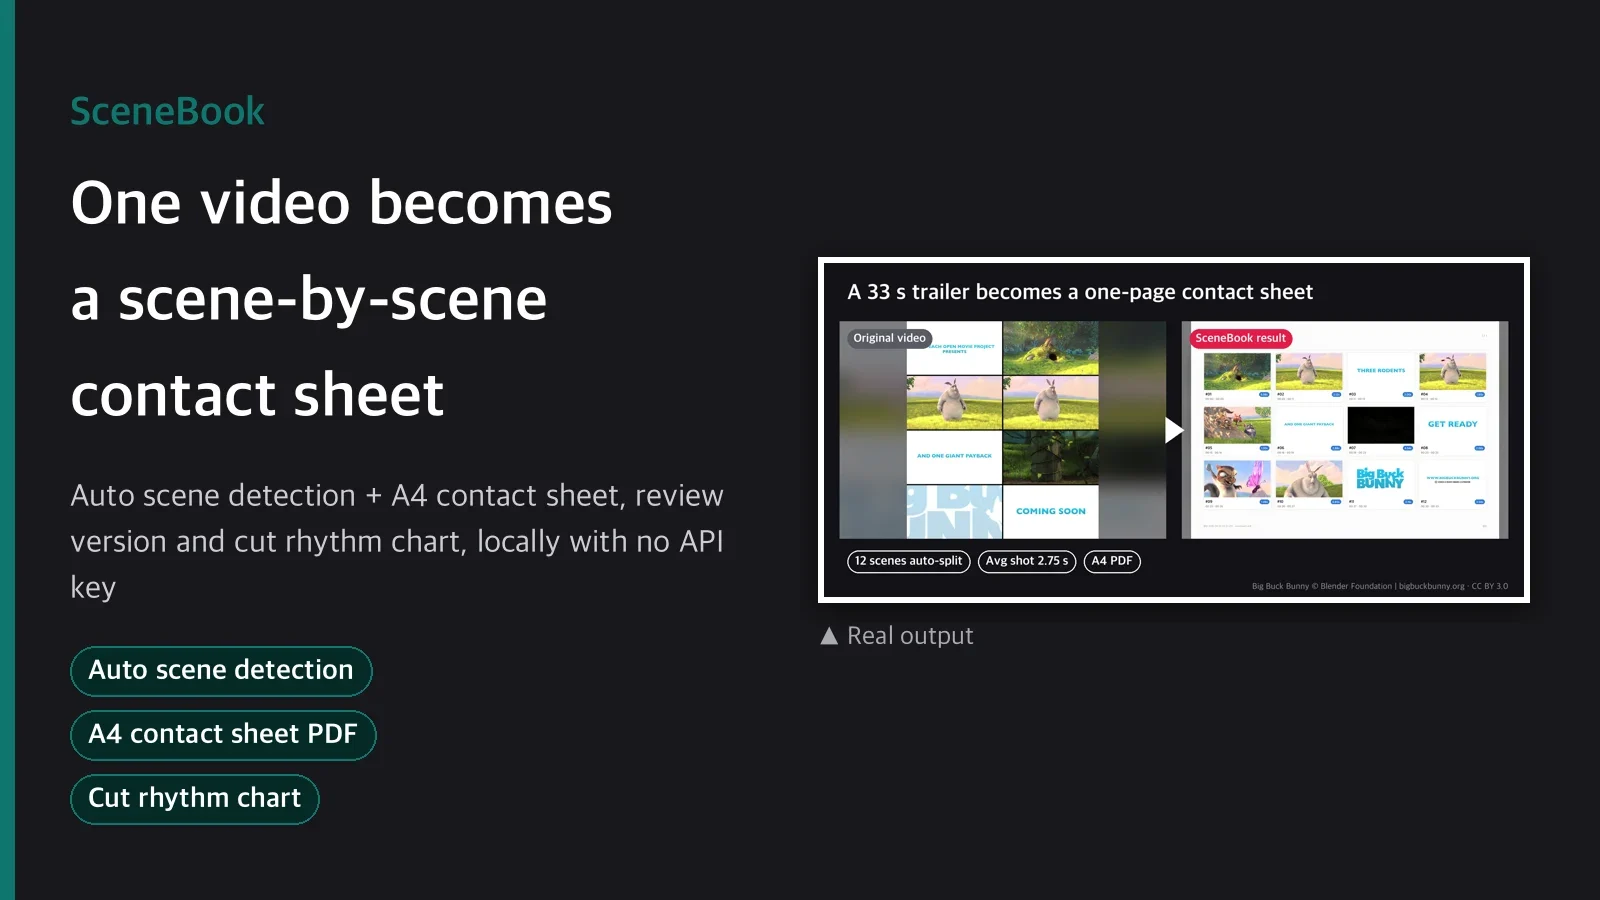
one by one is the same work repeated. SceneBook cuts it down to five scripts. ffmpeg finds the cut
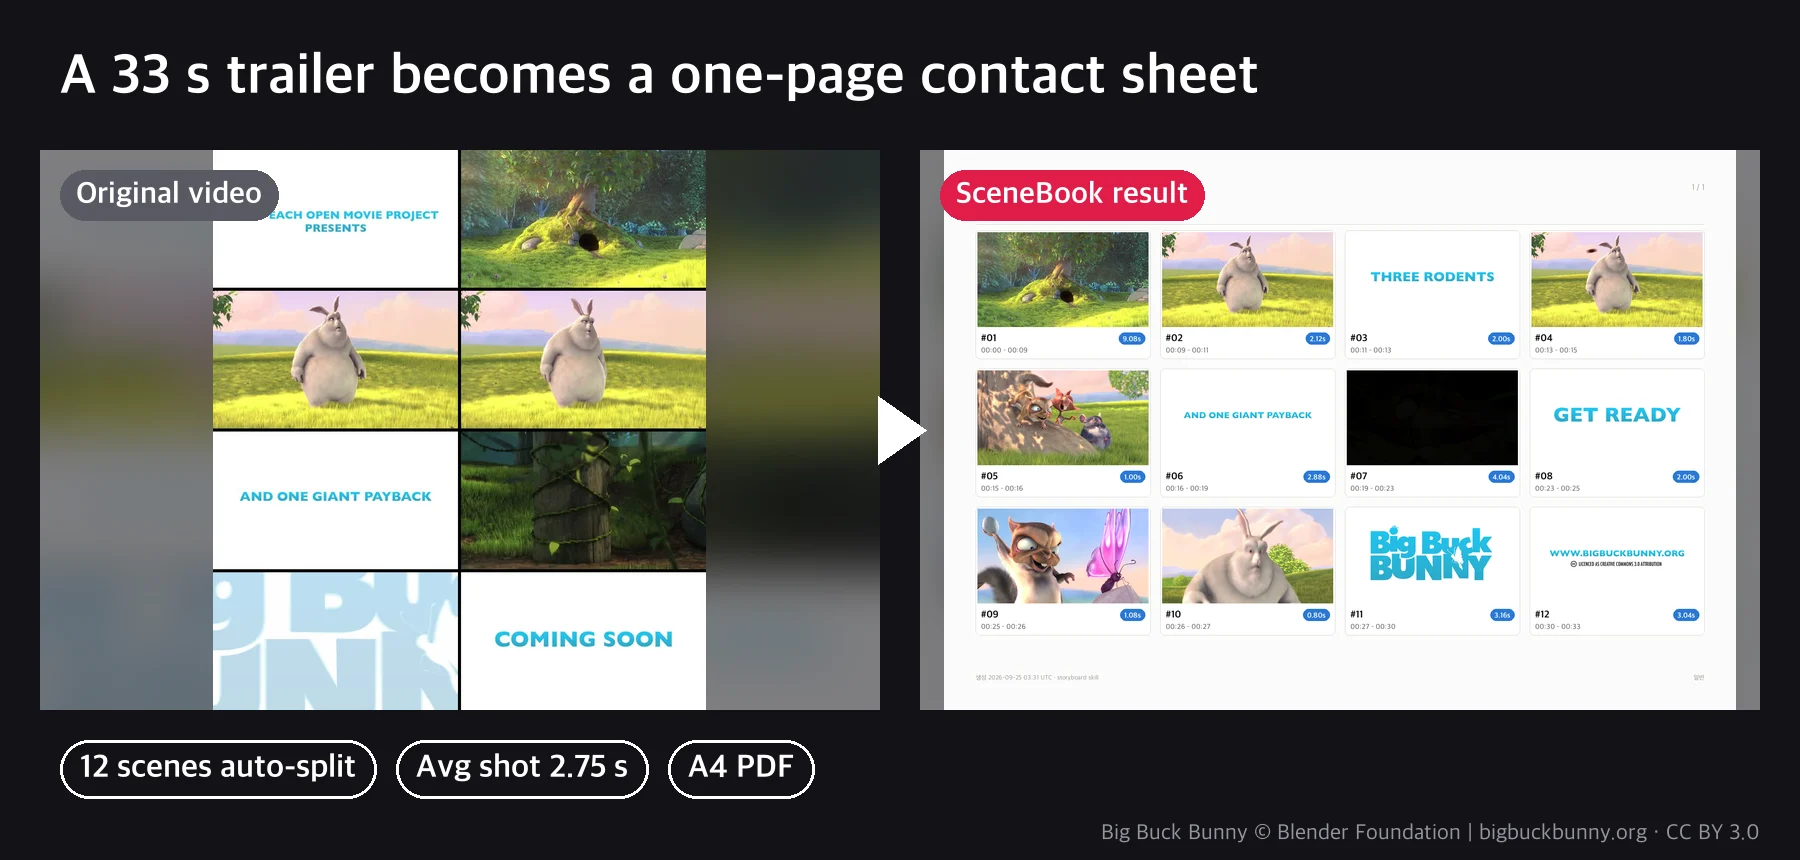
boundaries and pulls key frames, and you get a printable contact sheet, a review version with
comment boxes, a scene list and a cut rhythm chart in one run.
Pipeline
- Scene change detection: finds cut boundaries with ffmpeg
select='gt(scene,T)'+showinfo. It sweeps the threshold from 0.10 to 0.60 and shows a table of where the cut count
stays stable, and merges boundaries that would make scenes too short into the neighboring
scene, which filters false positives in scenes with heavy internal motion (fast zooms,
glitches). - Key frame extraction: pulls a still frame from the middle of each scene.
- Contact sheet: places cards with scene number, timecode and length badge in a grid on an A4
landscape layout (150dpi). If it does not fit on one page, it splits pages automatically and
also makes a PDF of all pages. A separate review version adds a blank comment box (3 lines)
under each card. - Scene list: start, end and length as CSV (Excel compatible) and a Markdown table.
- Cut rhythm chart: scene lengths as a bar chart with the average cut length as a dotted
line. Mean, median, min, max and standard deviation stats come with it.
Actual commands
uv run scripts/detect.py --input video.mp4 --out out/scenes.json \
  --threshold 0.27 --min-scene 1.0
uv run scripts/frames.py --scenes out/scenes.json --out-dir out/frames
uv run scripts/sheet.py --scenes out/scenes.json \
  --out-prefix out/contact_sheet --variant plain
uv run scripts/sheet.py --scenes out/scenes.json \
  --out-prefix out/contact_sheet_review --variant review
uv run scripts/list.py --scenes out/scenes.json \
  --out-csv out/scenes.csv --out-md out/scenes.md
uv run scripts/rhythm.py --scenes out/scenes.json --out out/rhythm_chart.png
For a 35-second sample video, the whole pipeline (including the threshold sweep) took under 7
seconds. Below are real results from running the commands above as is.
What's included
| File | Role |
|---|---|
scripts/detect.py |
Scene change detection + threshold sweep + min-scene merge |
scripts/frames.py |
Key frame extraction per scene |
scripts/sheet.py |
Contact sheet PNG (per page)/PDF, plain and review versions |
scripts/list.py |
Scene list CSV/Markdown |
scripts/rhythm.py |
Cut rhythm bar chart + stats JSON |
guides/threshold-tuning.md |
Threshold starting points by video type, how to read the sweep |
SKILL.md |
5-step procedure, options, limitations |
3 usage examples
- Preparing a rough-cut review: put in a 15-minute rough cut, make the review version of the
contact sheet and share it with stakeholders. Each person writes notes in the comment box under
the card, so no one has to explain which scene they mean. - Checking vlog cut counts: when you feel the average cut length of recent uploads is
getting longer, check the real mean and standard deviation in the cut rhythm chart and adjust
your editing pace. - Organizing footage: when raw footage mixes many scenes, export the scene list CSV to scan
what is where in a table, then pick only the scenes you need by timecode and plan the rough cut
order.
What you need
ffmpeg(Homebrew etc.) anduvmust be installed.- An OS font with Korean glyphs is needed: found automatically on macOS, Windows and major Linux
distributions; if not found, pass a TTF/TTC path with--font. - Scene detection is accurate mainly for hard cuts (instant changes). Gradual transitions such as
crossfades and dissolves have blurry boundaries, so even with threshold tuning they can be
missed or caught ambiguously. For such edits, we recommend checking the contact sheet yourself. - The accuracy measurement (precision/recall 100% against 10 known scenes, 0 ms boundary error)
is based on a hard-cut sample with no re-encoding. If real footage is re-encoded before you run
it, the encoder structure can cause an error of up to 1 frame (about 42 ms at 24fps). - In real use where you do not know the true scene count, you have to judge the threshold
yourself from the--autosweep table. It does not "pick it for you."
Recommended
- Solo editors or small teams who send rough cuts to review regularly
- Channel owners who want to check cut rhythm (average cut length, distribution) with data
- Work with lots of footage where timecodes need to be organized by scene
Not recommended
- Precise scene splitting of videos edited mostly with crossfades and dissolves: it is a hard-cut
tool, so accuracy drops on gradual transitions. - Uses that need preview during live editing: this skill is a batch job that takes a finished (or
rough-cut) video and organizes it in one go.
FAQ
Q1. I don't know what threshold to use.
Look at the sweep table with the --auto option first. Find the range where the cut count stays
stable (for example 9 cuts throughout 0.25 to 0.40) and pick a value inside it.guides/threshold-tuning.md has a table of starting points by video type.
Q2. Do scenes with fast motion (zooms, camera moves) cause false positives?
They can. In this card's E2E test we saw one extra false cut caught 80 ms apart inside a fast
zoom scene. However, the default --min-scene 1.0 automatically merges boundaries that get too
short into the neighboring scene, and the final result matched the ground truth exactly with no
false positives (see E2E.md).
Q3. What happens to the contact sheet with a very large number of scenes?
It splits pages automatically. A separate internal test with a 30-scene sheet split correctly into
3 pages, and a PDF of all pages was also generated.
Q4. Do I have to make both the comment-box version and the plain version every time?
No. Run sheet.py with --variant plain or --variant review to make only the one you want. If
you need both, run it twice.
Q5. Does this skill create new video or faces?
No. It only takes frames from the source video as is and lays them out with timecodes and
numbers; it does not composite or generate faces or scenes.
Purchase notes
After downloading, put the package/ folder in your project as is and start withuv run package/scripts/detect.py .... No separate install or API key registration is needed.
Just have ffmpeg and uv ready.
The example images are real runs on the trailer of the Blender Foundation open movie Big Buck Bunny (CC BY 3.0, bigbuckbunny.org).