StickerCut | Images to die-cut sticker cut files
Sticker art in, cut-ready files out
Making die-cut stickers means the same chores for every design: remove the background, add a white border, draw a cut line that the blade can follow, size it, and fit as many as possible on a sheet. StickerCut does these steps on your own images and measures the files it saves.
Upload one or more images: a PNG with transparency, a JPG or PNG on a plain background (clip art, exported drawings), or a photo. Several files or one .zip are fine. Tell me the size you want and, if you like, the border width, your machine and how many per sheet.
You must own the rights to images you upload.
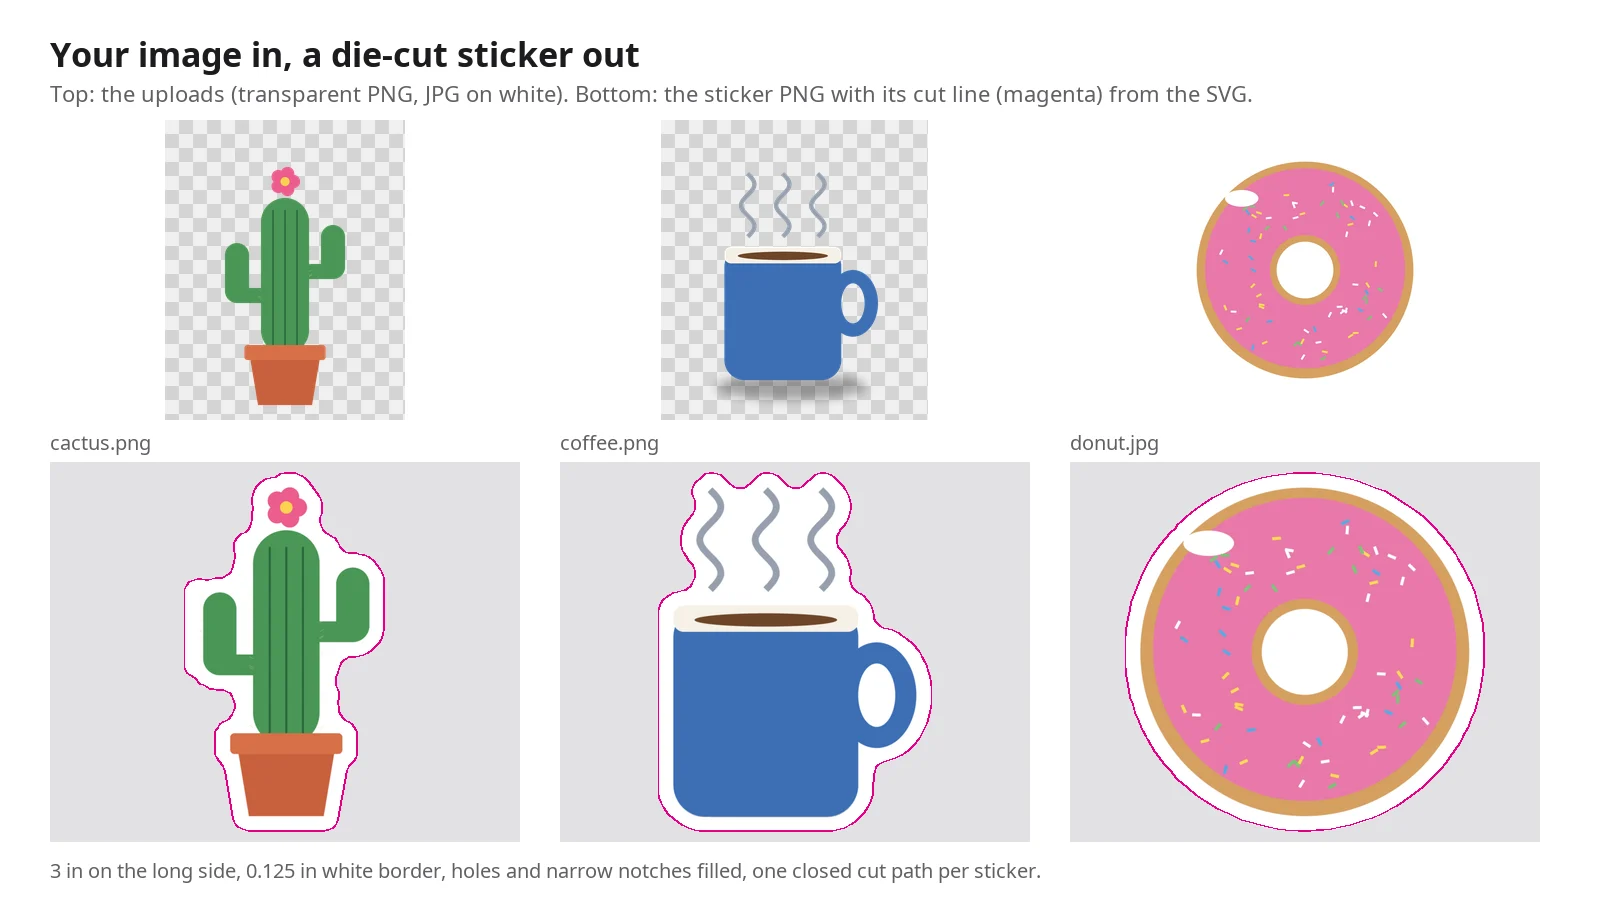
The cactus, cup and donut are drawings made for testing. The cup's shadow lay outside the solid art and was left out; the donut's hole is filled with border, because each sticker gets one outer cut line.
What you get
| File | What it is | Use it in |
|---|---|---|
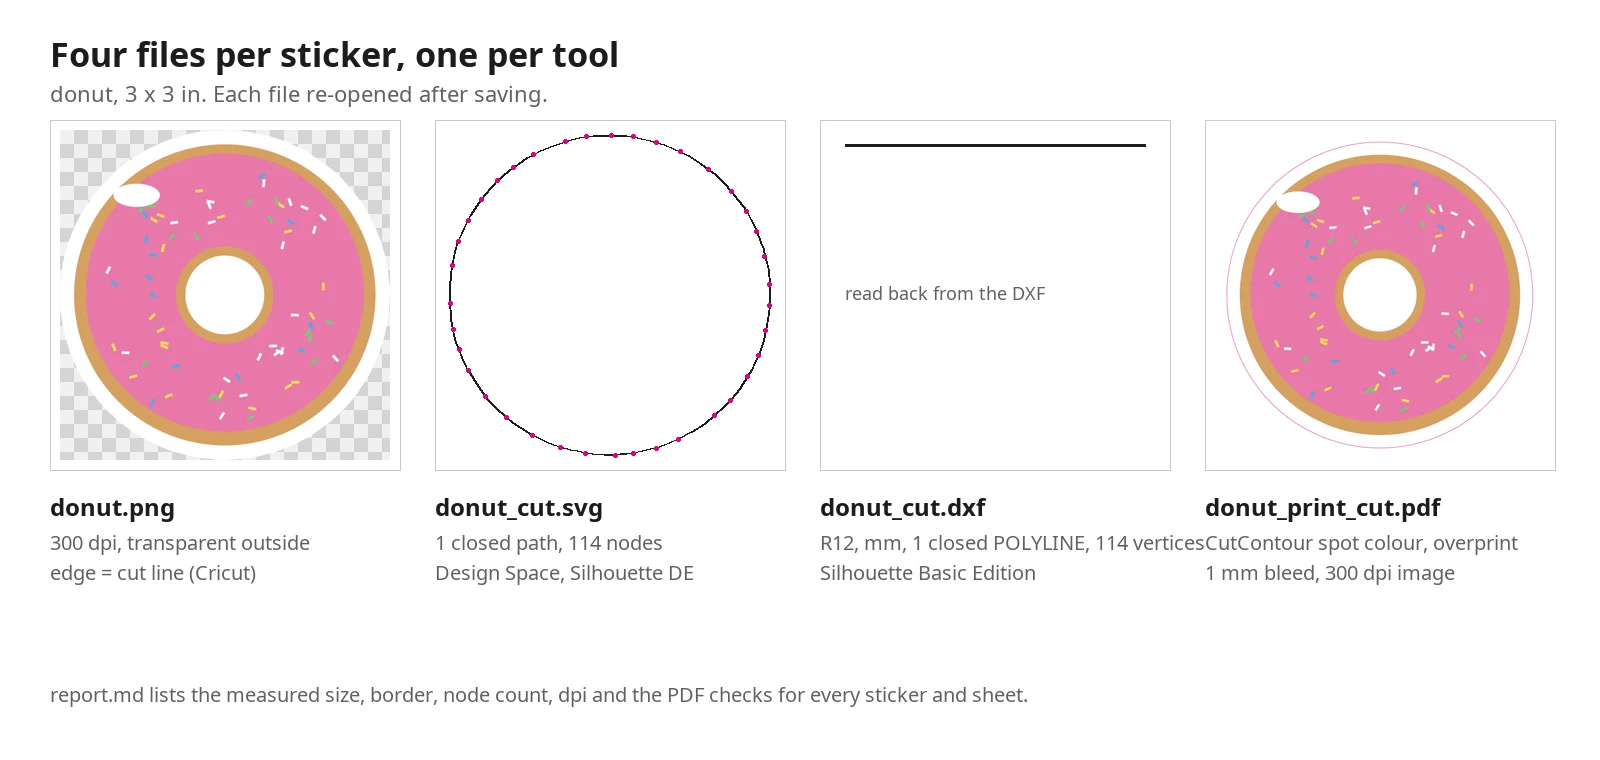
stickers/NAME.png |
300 dpi, white border included, transparent outside the cut line | Cricut Design Space (upload as a Print Then Cut image; its edge is the cut line) |
stickers/NAME_cut.svg |
The cut line alone: one closed path, sized in mm | Design Space, Silhouette Studio Designer Edition, Inkscape, Illustrator |
stickers/NAME_cut.dxf |
The same line as an R12 DXF in mm | Silhouette Studio Basic Edition, which opens DXF but not SVG |
stickers/NAME_print_cut.pdf |
Print file; the cut line is a vector path in the spot colour CutContour, with bleed |
Print shops and print-and-cut RIPs (for example Roland VersaWorks) |
sheets/sheet_PRESET_N.png, _cut.svg, _cut.dxf, sheet_PRESET.pdf |
Sheets packed with your stickers | Cricut Print Then Cut (6.75 x 9.25 in), US Letter, A4 |
report.md |
Measured size, border, node count and resolution per sticker; gaps and overlaps per sheet | Checking before you print |
Sizes are the finished sticker at the cut line, border included, in inches or mm. Defaults: 3 in on the long side, 0.125 in border, 1 mm bleed in the print PDFs.
The border is measured
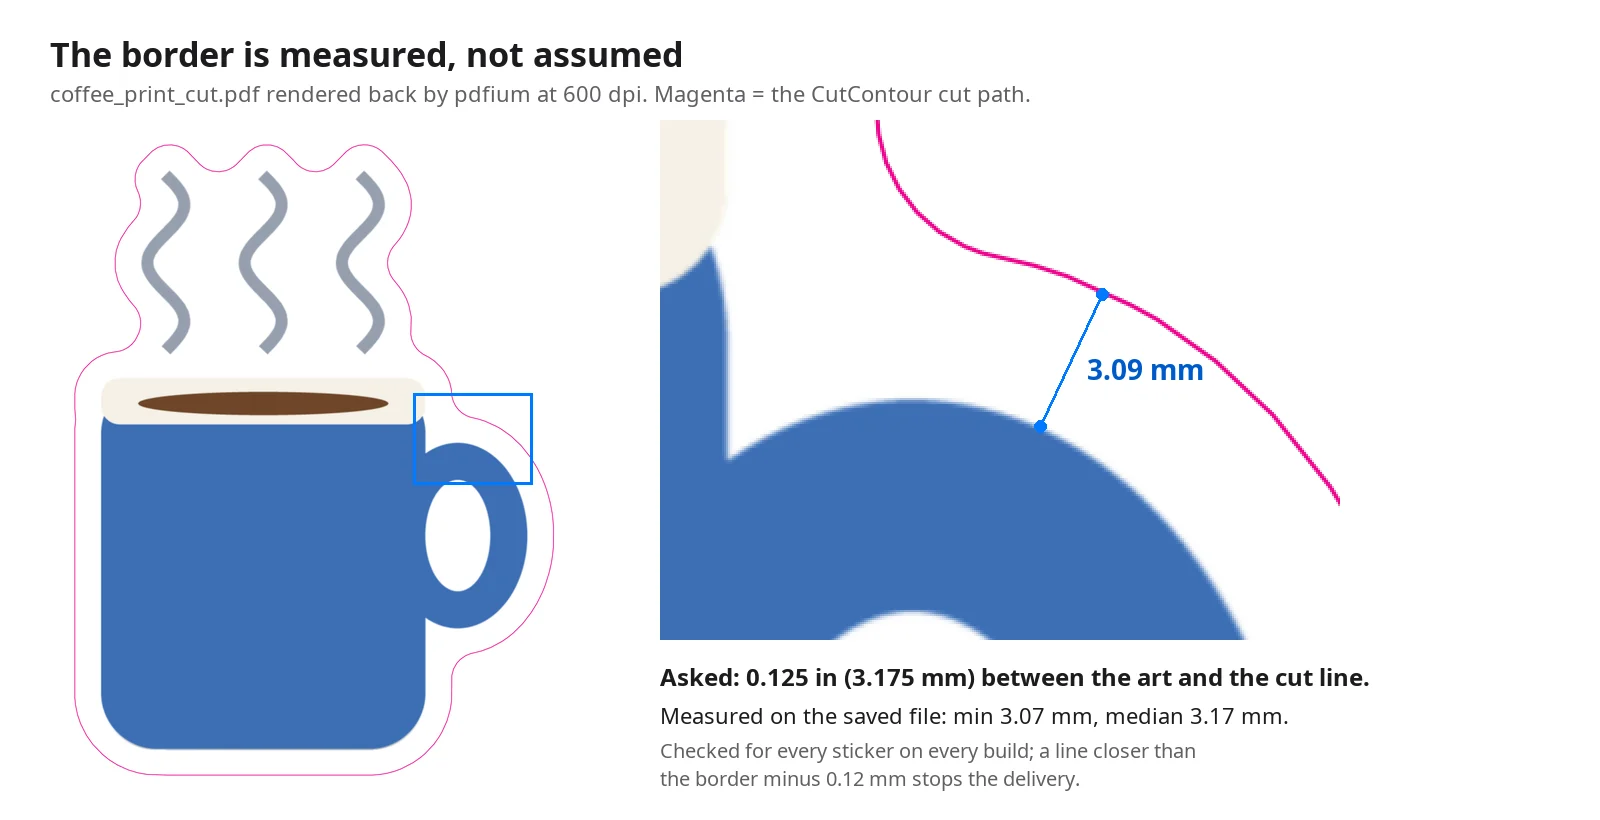
After saving, every PDF is rendered again and every PNG re-opened. The distance from the art to the cut line is measured all the way round. For the stickers on this page, asked 3.175 mm, the closest point measured 3.07 mm and the median 3.16 to 3.20 mm. A cut line closer than the border minus 0.12 mm stops the delivery. Narrow notches (between cactus arms, around the cup handle) are bridged so the blade does not turn into them.
Sheets packed by shape
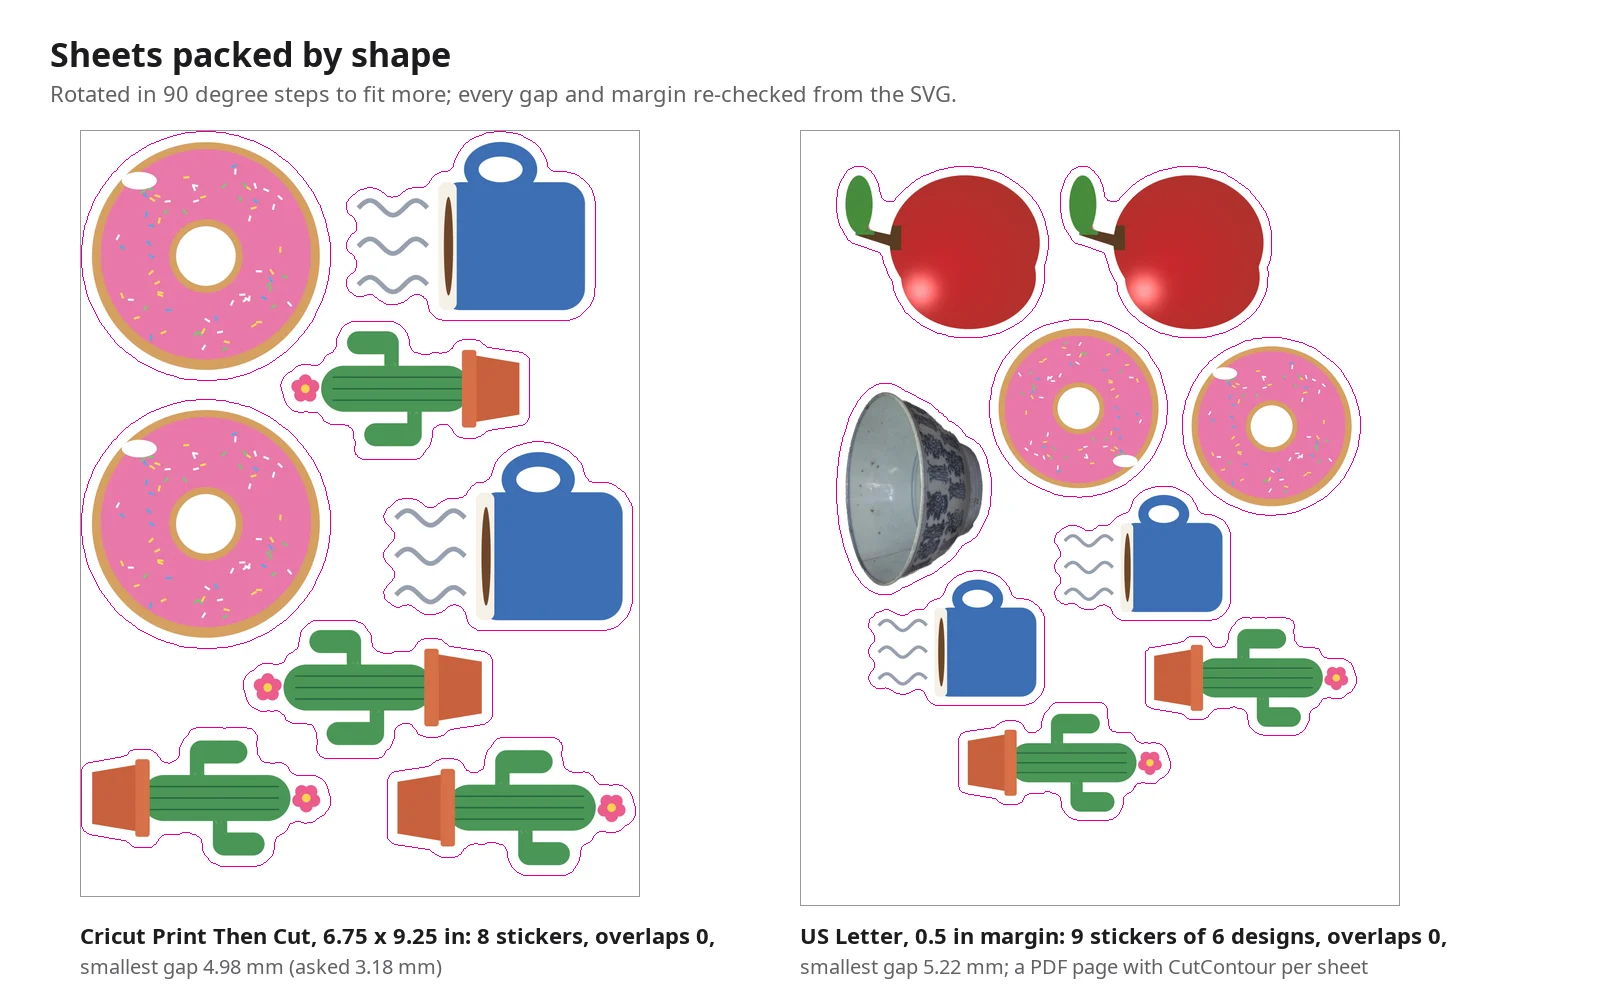
Stickers are packed by their real outline, not by boxes, turned in 90 degree steps when that fits more (you can keep them upright). Ask for a number of copies, or for the sheet to be filled. Every sheet is checked from its own SVG: overlaps 0, smallest gap at least what you asked (0.125 in by default), everything inside the margins. The Cricut preset uses Cricut's stated Print Then Cut maximum of 6.75 x 9.25 in; Design Space adds its sensor marks around it. Letter and A4 keep a 0.5 in margin by default for Silhouette registration marks and printers.
Photos
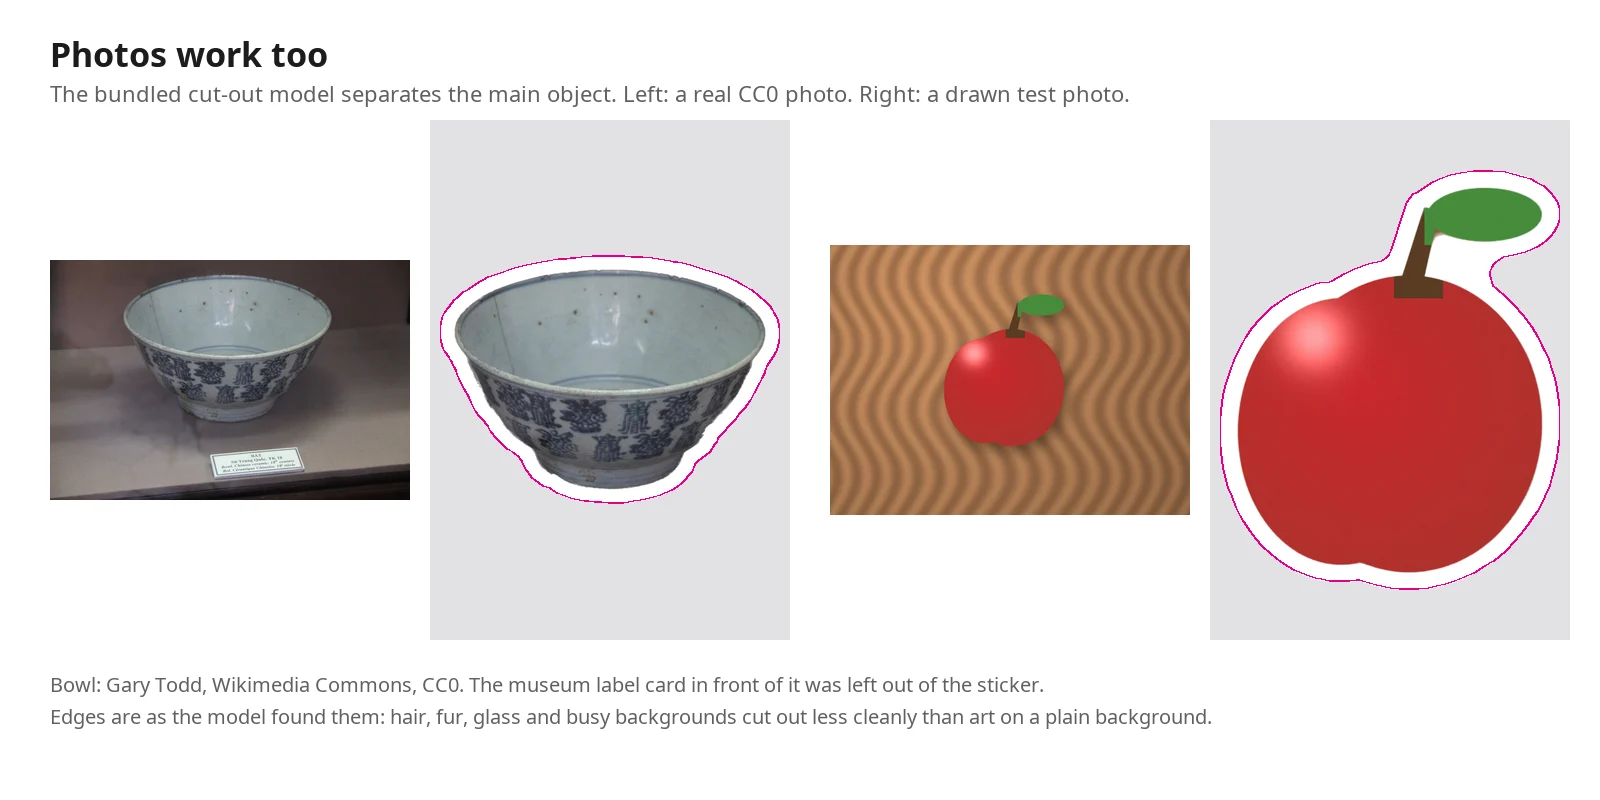
Photos go through a background-removal model that ships with the agent. The bowl photo is a real CC0 image from Wikimedia Commons (Gary Todd); the label card in front of the bowl was left out. Edges are as the model found them. Art with transparency or on a plain background gives the cleanest outline; hair, fur, glass and busy backgrounds cut out less cleanly.
Timing
Measured in a local copy of the sandbox (2 CPU, 4 GB): cutting out 6 images takes about 4 seconds (a photo about 1.2 seconds, a PNG well under 1), 20 images about 9 seconds. Building 6 stickers with two filled Letter pages takes about 12 seconds; 20 stickers and 57 on two pages about 13 seconds; a Cricut sheet about 3 seconds. Most of the time per request is the AI reading your message and checking the preview.
Plans and limits
| Plan | Price | Requests |
|---|---|---|
| Daily | $2.99 | 5 per day |
| Weekly | $7.99 | 10 per week |
| Monthly | $19.99 | 30 per month |
Every message you send uses 1 request from your plan. One request can hold up to 30 images. The weekly plan starts with a 1-day free trial that includes 2 requests.
What this agent doesn't do
- Draw, generate, redraw or upscale art. The stickers are your images with a plain white border.
- Make stickers of art you do not have the rights to print.
- Keep holes inside a design open: each sticker gets one outer cut line, and holes are filled with border.
- Convert to CMYK. Files stay RGB (sRGB) as uploaded; the white border is unprinted paper.
- Send anything to your machine or print shop, or log in to Cricut or Silhouette. You upload the files yourself.
- Promise a perfect cut: alignment depends on your machine's calibration (Silhouette's own guide allows about 1/16 in).
FAQ
Which file do I upload to Cricut Design Space? The PNG: a single sticker or sheet_cricut_N.png. Upload it as a Print Then Cut image; the transparent edge becomes the cut line. Check that the size reads as in report.md (a sheet reads 6.75 x 9.25 in) and print from Design Space.
I use Silhouette Studio Basic Edition. Open the DXF. Designer Edition can open the SVG. Turn on registration marks and keep stickers out of the hatched area; if one sits in it, ask for a larger margin.
My print shop asked for a CutContour layer. Send the _print_cut.pdf or the sheet PDF. The cut line is a vector path in a spot colour named CutContour, overprinting, with 1 mm of white bleed past it (you can ask for 0 to 3 mm).
Can the border follow the shape more closely? Yes. Ask for a thinner border (0.5 mm and up) or a tighter outline; or a rounder one.
My image is small. You still get the files, and report.md marks the resolution when the art falls below 150 dpi at your size, with the pixel count needed for 300 dpi.
External APIs
PyPI (pypi.org, files.pythonhosted.org)