

FormFit — Auto Reframe Video for Shorts & Reels
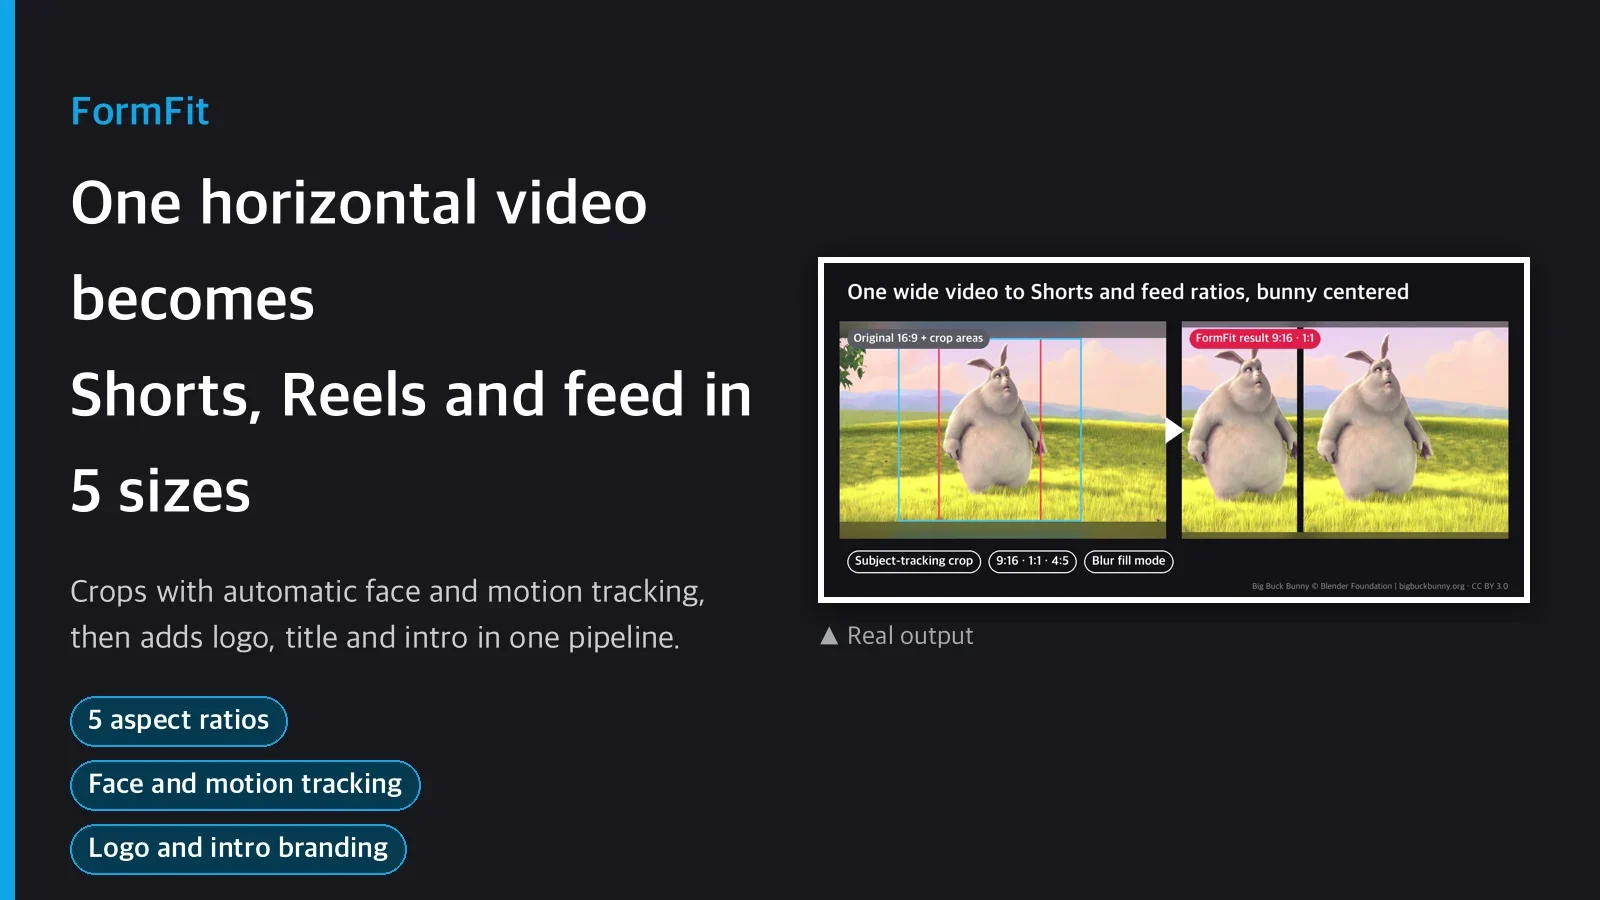
FormFit — Auto Reframe Video for Shorts & Reels
If you have ever taken one horizontal video and reopened the editor to cut it for Shorts, Reels
and the Instagram feed, you know the worst part is setting the crop position by hand for each
aspect ratio so the subject does not leave the frame. Add the logo watermark again each time,
and 30 minutes go by on a single video. FormFit cuts that repetition down to three scripts. It
follows the subject automatically while cropping, and adds the logo, title and intro/outro in one
pipeline. In our measurement, one 8-second source took under 6 seconds through the analyze,
reframe and brand steps.
It is not offered for impersonating real people, deepfakes or deception.
Pipeline
- analyze: tracks the subject center with face detection (Haar cascade) first, switching to
motion-based tracking when there is no face, smooths out shake, and savescrop_path.json. - reframe: follows that path to crop to the target aspect ratio (
cropmode), or, for scenes
where cropping would lose information, usesblurmode, which keeps the whole frame and fills
the margins with blur. - brand: adds a logo (corner, opacity and margin settings), a top/bottom title bar (Korean
supported, rendered with Pillow) and intro/outro card images for the final output.
Actual commands
uv run scripts/analyze.py --input in.mp4 --output crop_path.json

uv run scripts/reframe.py --input in.mp4 --crop-path crop_path.json \
    --preset shorts --mode crop --out out/9x16.mp4

uv run scripts/brand.py --input out/9x16.mp4 --out out/9x16_branded.mp4 \
    --logo logo.png --logo-corner br --logo-opacity 0.85 \
    --title "채널 이름" --intro intro.png --outro outro.png
What's included
| Item | Contents |
|---|---|
scripts/analyze.py |
Face/motion-based subject tracking → crop_path.json |
scripts/reframe.py |
Reframing with 4 platform presets × 2 modes (crop/blur) |
scripts/brand.py |
Logo, title bar, intro/outro branding |
guides/platforms.md |
Resolution, fps and length specs for Shorts, Reels, TikTok, Instagram feed, YouTube |
guides/recipes.md |
Batch processing and troubleshooting (FAQ) |
Presets: shorts (9:16, 1080x1920) · feed-square (1:1, 1080x1080) · feed-portrait (4:5,
1080x1350) · youtube (16:9, 1920x1080). All output as H.264 + AAC with +faststart.
3 usage examples
1) YouTube long-form → Shorts clip
Cut a section from a horizontal interview or vlog and convert it to vertical for Shorts. It tracks
faces first, so the speaker stays in the center of the frame.
uv run scripts/analyze.py --input interview.mp4 --output cp.json
uv run scripts/reframe.py --input interview.mp4 --crop-path cp.json \
    --preset shorts --mode crop --out shorts.mp4
uv run scripts/brand.py --input shorts.mp4 --out shorts_final.mp4 \
    --logo logo.png --title "이번 주 하이라이트"
2) Lecture/presentation screen → Instagram feed 4:5
When the whole slide matters, cropping cuts off text. blur mode keeps the whole frame and fills
only the margins with blur (no tracking needed, analyze can be skipped).
uv run scripts/reframe.py --input lecture.mp4 --preset feed-portrait \
    --mode blur --out feed_4x5.mp4
3) Apply a brand logo + intro/outro in bulk
Put the same logo and intro card on several already-reframed videos at once to keep a consistent
look.
for f in clip1.mp4 clip2.mp4 clip3.mp4; do
  uv run scripts/brand.py --input "$f" --out "branded_$f" \
    --logo logo.png --logo-corner br --intro intro.png --outro outro.png
done
What you need
This is all you need, no more.
uv,ffmpeg/ffprobe(must be on PATH). No API key.- For a logo, a transparent-background PNG is recommended (an opaque background works, but looks
less like a watermark). - For Korean titles, the OS needs a Korean font (built in on macOS/Windows; on some minimal Linux
installs you need to install Noto Sans CJK or pass a path with--font). - Automatic subtitles and music are not included: it only does reframing and branding.
Recommended / not recommended
Recommended
- You need vertical and square clips for several platforms from one horizontal source
- Content with a subject that has a clear position on screen, such as a person or product
- You need to apply the same logo and intro to many videos
Not recommended
- If the whole frame matters evenly (several people, charts, captions) so cropping is not suitable
in the first place, you will only useblurmode and get little out of the tracking - If you need automatic subtitles, this skill alone is not enough (you need a separate STT skill)
- Extremely fast subjects that cross the frame in under 1 second can briefly catch at segment
boundaries (reduce--chunk-secto soften this; details in the FAQ)
FAQ
Q1. Does face detection really work on real people?
Face detection uses the standard OpenCV Haar cascade (frontal faces). However, the test videos for
this card could not use real people because of policy, so we tested with synthetic shapes; with no
faces, it switched automatically to motion-based tracking, and that path is what we measured. The
face detection itself is a standard, proven algorithm, but we do not claim "verified directly on
real people." It can miss side faces, low light or masks, and in those cases it moves over to
motion tracking.
Q2. Is the output exactly the same length as the source?crop mode encodes in segments and joins them, so when the source and output frame rates differ
(for example 25fps → 30fps), rounding errors add up. In our measurement, an 8-second source came
out about 0.26 s (+3.2%) longer. Audio does not drift and segments are not misaligned internally.
Q3. Should I use crop or blur?
crop if the subject is in one place, blur if information across the whole frame matters. SKILL.md
and guides/recipes.md have the criteria and examples.
Q4. Why not use the drawtext filter?
The default Homebrew ffmpeg build often has no drawtext/subtitles (libass, freetype) filter
(verified). So text and logos are drawn by Pillow as transparent PNGs and applied with the overlay
filter; it works on the buyer's machine without a separate ffmpeg build.
Q5. Can I batch process several videos at once?
The skill itself has no batch runner. Instead, guides/recipes.md has a recipe that wraps the
three scripts in a shell loop; copy and use it.
Purchase notes
One-time download purchase. Follow the SKILL.md instructions in the archive and run it withuv. No account sign-up or API key is needed to run it. Search "FormFit" on Capafy to find it.
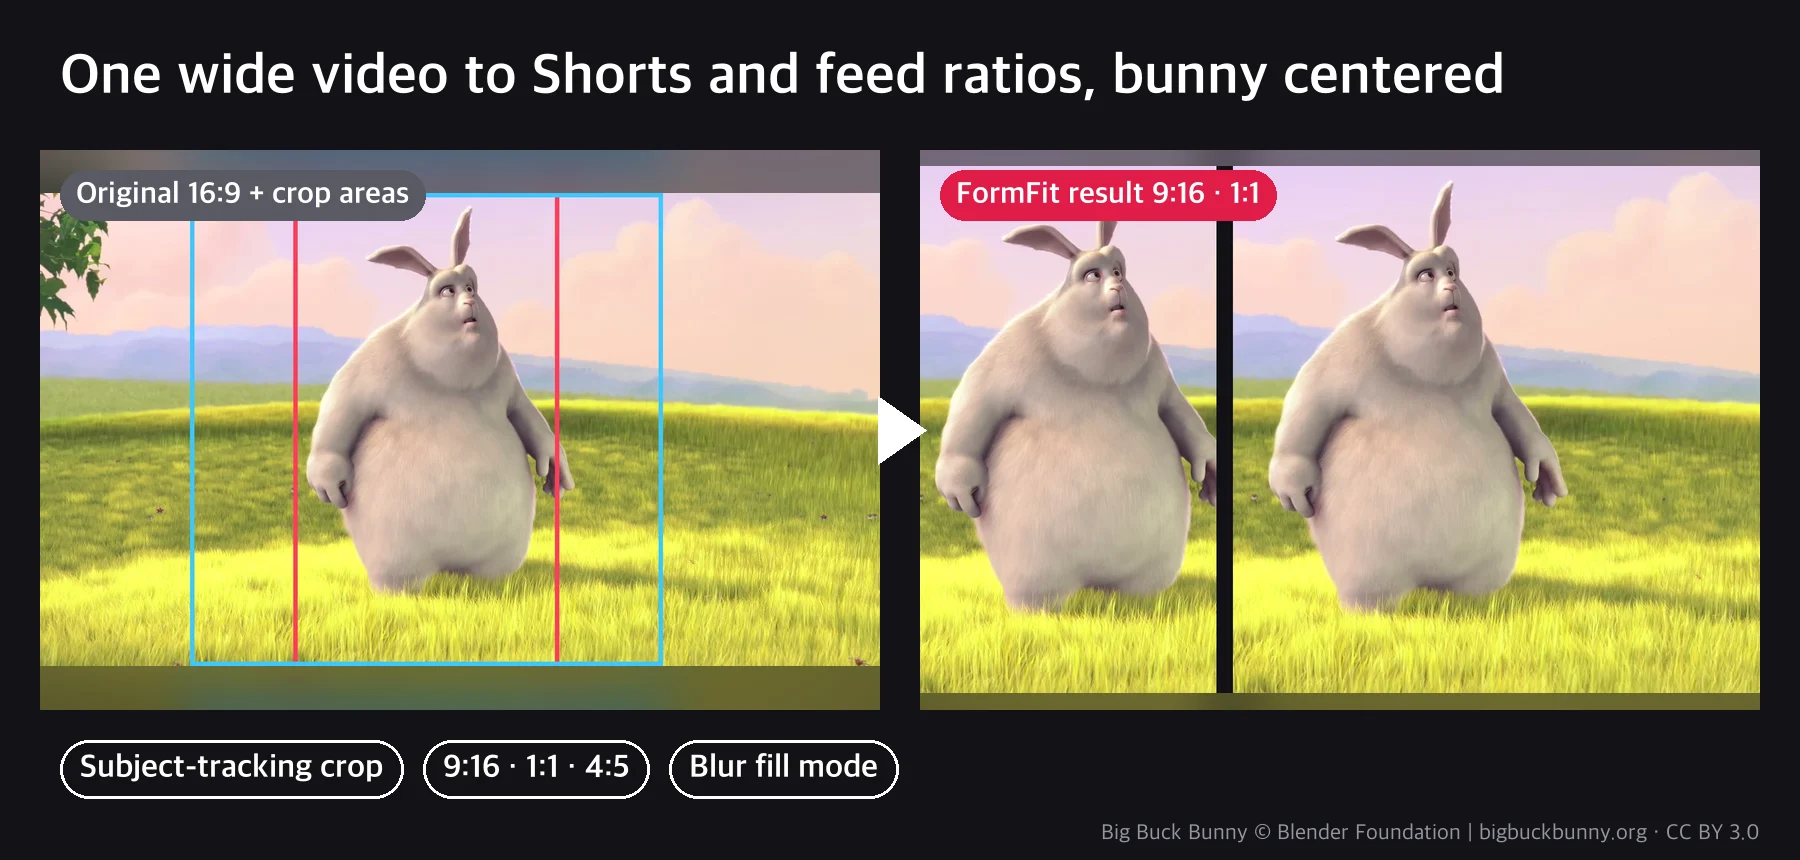
The example images are real runs on the trailer of the Blender Foundation open movie Big Buck Bunny (CC BY 3.0, bigbuckbunny.org).